Thursday 27 August 2015

Steps:


1
Get equipment, at least a stick and a ball. There are plenty of brands; shop around and find a stick that's of a comfortable weight and height for you, not just one that's pretty. The size of the stick should come up to your waist. Shin and/or ankle guards are a good idea, too. Like in many sports, a mouth guard is usually required if you want to get into league. See stuff you need at bottom for list. Make sure to buy a beginner stick if you are just starting.
 

             2 Get a grip. With your left hand, grip your stick at the top with knuckles lined up and thumb pointing down towards the hooked bit of the stick, roughly aligned with the bit that's pointing up. Hook thumb around handle if desired (people have been known to break 'em on collision). Your right hand should grip your stick at a point lower on the stick that is comfortable to you. You should be able to stand with the hooked tip grazing the ground, the flat end facing out. Let all fingers grip the stick and practice going low into a crouched stance. Make sure you keep your chest up and bend at the waist. This will allow for better vision of the field and more control.

             3
Remember that your left hand does the guiding of the stick, your right hand is only there for support. There is no such thing as a "lefty" stick, so make sure you always use your left hand.

             4
Take a stance. Left foot pointing front, right foot back support. Bend your knees slightly, aim for the ball, which should be in line with your left foot or slightly before it, but not ahead. It is important to remember to not bend your back so much as keep your KNEES BENT. Otherwise, you will be very sore the next day! Practice getting the edge of the flat side on the ground as a stop. The ball should be a your sticks' length away from you body.

             5 Trap the ball. Many people put their sticks down, parallel to the ground (to maximize obstructive surface area), but with practice you'll be able to just get behind the ball. To stop the ball, as it's coming towards you, move backwards, to slow the ball before stopping it. Just keeping the stick still often means the ball will roll over the stick, and hitting the ball will often cause it to go haywire in a completely different direction. Let the ball come slightly across your body, and lean the stick in to catch the ball. Be gentle receiving the ball; pretend it is an egg and make sure you receive it lightly and carefully.

              6
Perfect the Indian dribble or reverse stick. When the ball is on your left, twist the stick with your left hand so that the flat side is again facing out correctly. Let go of your right hand as you twist, grip again once stick is in position. Make sure you never touch the ball with the rounded side of the stick; always use the flat side. The Indian dribble consists of tiny taps across the ball to move it forward. It is great to use to keep the ball in your possession. Don't give up! Even experienced players can have a hard time with the Indian dribble.

               7 Hit it! Move your right hand closer to your left hand (i.e. up) (but note: this isn'tgolf), the ball should be in line with your forward foot. There are several different types of shots:
  • Slap-shots: Choke down your right and pretend you're playing cricket. Be careful though, sometimes the ball can go a different direction to the way you're intending it too if you're not experienced with hitting. Only hit the ball in a desperate circumstance, or when you're shooting for a goal.
  • Pushes: grip should be between that for a hit and a slap-shot; ball should be right in front of the flat side of your stick, which should be somewhere around your back foot. Transfer weight from back foot to front foot, lean into it and push. A push is often used for passing, as it is swift and easy.
  • Hook variation: place stick almost parallel to ground, hooked portion curving lovingly around the ball. Ball and hook end of stick should be behind back foot. Transfer weight from back foot to right foot, pull hard then push in one smooth motion.
  • Flicks: hands in slap-shot grip, dig edge of stick beneath ball, much as you would toe scoop a soccer ball, lift and push, transferring weight from back foot to front foot.
  • Drives: Holding both hands at the end of the grip, like a golf club, bring the field hockey stick back until about waist-height, and swing towards the ball. Don't over swing, or you can hit another player! Keep your eyes down at the ball and do not look up after hitting; just like in golf. Just remember, this is not a golf swing! Bend down at your knee, and make sure the toe of your stick is facing up. Your foot should be facing in the direction you want the ball to go.


Thursday 13 August 2015

  1. Cricket is a game played with a bat and ball on a large field, known as a ground, between two teams of 11 players each.
    The object of the game is to score runs when at bat and to put out, or dismiss, the opposing batsmen when in the field. The cricket rules displayed on this page here are for the traditional form of cricket which is called “Test Cricket”.
    However there are other formats of the game eg. 50 over matches, Twenty20 Cricket etc where the rules differ slightly.
    Fielding positions in cricket for a right-handed batsman
    Fielding positions in cricket for a right-handed batsman
    A typical cricket field
    A typical cricket field

    Player: Official Cricket Rules

    Cricket is a game played between two teams made up of eleven players each. There is also a reserve player called a “twelfth man” who is used should a player be injured during play.
    The twelfth man is not allowed to bowl, bat, wicket keep or captain the team. His sole duty is to act as a substitute fielder.
    The original player is free to return to the game as soon as they have recovered from their injury.
    To apply the law and make sure the cricket rules are upheld throughout the game there are two umpires in place during games. Umpires are responsible for making decisions and notifying the scorers of these decisions.
    Two umpires are in place on the playing field while there is also a third umpire off the field who is in charge of video decisions.
    This is where the call is too close for the on field umpires and they refer it to the third umpire who reviews slow motion video replays to make a decision.

    Game Structure

    Test cricket is a game that spans over two innings. This means that one team needs to bowl the other team out twice and score more runs then them to win the match. Another key difference between test cricket and other forms of cricket is the length of the innings. In test cricket there is no limit to the innings length. Whereas in one day cricket & Twenty20 cricket there are a certain amount of overs per innings. The only limits in test cricket is a 5 day length. Before the game begins an official will toss a coin. The captain who guesses the correct side of the coin will then choose if they want to bat or field first. One team will then bat while the other will bowl & field. The aim of the batting team is to score runs while the aim of the fielding team is to bowl ten people out and close the batting teams’ innings. Although there are eleven people in each team only ten people need to be bowled out as you cannot have one person batting alone. Batting is done in pairs.
    Once the first team has been bowled out the second team would then go into bat. Once the second team is then bowled out it would normally return to the first team batting again. However there is an exception to this in the cricket rules, it is called the follow-on. The follow-on is when the first team makes at least 200 runs more than the second team made (in a 5 day test match). This then gives the first team the option to make the second team bat again. This is particularly useful if the game is progressing slowly or affected by bad weather and there might not be enough time for both teams to play a full innings. Should this be the case the batting team’s captain also has the right to forfeit their innings at any time. This is called a declaration. Some may wonder why a captain would forfeit the opportunity for his team to bat. However if the game is coming close to a close and it looks like they will not be able to bowl the other team out again this could be an option. If one team is not bowled out twice and a winner determined in the five days of play the game is declared a draw. Therefore it may be worth declaring an innings to creat the possibility of a win rather than a draw.

    Ways to score runs

    The aim of the batsmen is to score runs. One of the main cricket rules is that for batsmen to score runs they must run to each other’s end of the pitch (from one end to the other). In doing this one run is scored. Cricket rules state they may run multiple runs per shot. As well as running they can also score runs by hitting boundaries. A boundary scores the batsmen either 4 or 6 runs. A four is scored by hitting the ball past the boundary after hitting the ground while a six is scored by hitting the ball past the boundary on the full (before it hits the ground). Cricket rules also state that once a 4 or 6 has been scored any runs physically ran by the batsman are null & void. They will only obtain the 4 or 6 runs.
    Other ways runs can be scored according to the cricket rules include no balls, wide balls, byes & leg byes. Cricket rules state that all runs scored by these methods are awarded to the batting team but not the individual batters.
    • A “No Ball” can be declared for many reasons: If the bowler bowls the ball from the wrong place, the ball is declared dangerous (often happens when bowled at the batsmen’s body on the full), bounces more than twice or rolls before reaching the batsman or if fielders are standing in illegal positions. The batsman can hit a no ball and score runs off it but cannot be out from a no ball except if they are ran out, hit the ball twice, handle the ball or obstruct the field. The batsman gains any runs scored off the no ball for his shot while the team also gains one run for the no ball itself.
    • A “Wide Ball” will be declared if the umpire thinks the batsman did not have a reasonable opportunity to score off the delivery. However if the delivery is bowled over the batsmen’s head it will not be declared a wide but a no ball. Umpires are much stricter on wide deliveries in the shorter format of the game while being much more relaxed in test cricket. A wide delivery will add one run to the batting team and any runs scored by the batsman. The batsman is not able to get out off a wide delivery except if they are stumped, run out, handle the ball, hit their wicket or obstruct the field.
    • A “Bye” is where a ball that isn’t a no ball or wide passes the striking batsman and runs are scored without the batsman hitting the ball.
    • A “Leg Bye” is where runs are scored by hitting the batsman, but not the bat and the ball is not a no ball or wide. However no runs can be scored if the striking batsman didn’t attempt to play a shot or if he was avoiding the ball.

    Ways Batsmen can be given out according to cricket rules

    There are a number of different ways a batsman can be given out in the game of cricket. When a bowler gets a batsman out it is said that the bowler gets a “wicket”. Following are the different ways a batsman can be given out according to the rules of cricket:
    • Bowled – Cricket rules state that if the ball is bowled and hits the striking batsman’s wickets the batsman is given out (as long as at least one bail is removed by the ball). It does not matter whether the ball has touched the batsman’s bat, gloves, body or any other part of the batsman. However the ball is not allowed to have touched another player or umpire before hitting the wickets.
    • Caught – Cricket rules state that if a batsman hits the ball or touches the ball at all with his bat or hand/glove holding the bat then the batsman can be caught out. This is done by the fielders, wicket keeper or bowler catching the ball on the full (before it bounces). If this is done then cricket rules state the batsman is out.
    • Leg Before Wicket (LBW) – If the ball is bowled and it hits the batsman first without the bat hitting it then an LBW decision is possible. However for the umpire to give this out he must first look at some of the factors stated in the cricket rules. The first thing the umpire need to decide is would the ball have hit the wickets if the batsman was not there. If his answer to this is yes and the ball was not pitched on the leg side of the wicket he can safely give the batsman out. However if the ball hits the batsman outside the line of off stump while he was attempting to play a stroke then he is not out.
    • Stumped – A batsman can be given out according to cricket rules when the wicketkeeper puts down his wicket while he is out of his crease and not attempting a run (if he is attempting a run it would be a runout).
    • Run Out - Cricket rules state that a batsman is out if no part of his bat or body is grounded behind the popping crease while the ball is in play and the wicket is fairly put down by the fielding side.
    • Hit Wicket – Cricket rules specify that if a batsman hits his wicket down with his bat or body after the bowler has entered his delivery stried and the ball is in play then he is out. The striking batsman is also out if he hits his wicket down while setting off for his first run.
    • Handled The Ball – Cricket rules allow the batsman to be given out if he willingly handles the ball with the hand that is not touching the bat without the consent of the opposition.
    • Timed Out – An incoming batsman must be ready to face a ball or be at the non strikers end with his partner within three minutes of the outgoing batsman being dismissed. If this is not done the incoming batsman can be given out.
    • Hit The Ball Twice – Cricket rules state that if a batsman hits a ball twice other than for the purpose of protecting his wicket or with consent from the opposition he is out.
    • Obstructing The Field – A batsman is out if he willingly obstructs the opposition by word or action
    There are many other cricket rules. However these are most of the basics and will get you well on your way to playing the game. Many of the more advanced rules & laws can be learned along the way and are not vital to general play.


Details About Volley Ball


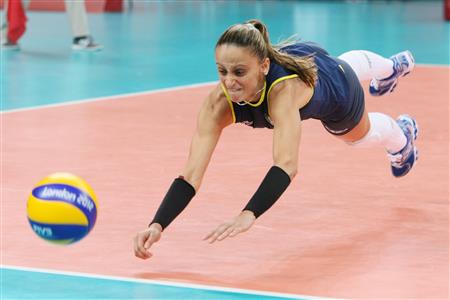
Volleyball Spike Approach

Which players on the team perform the volleyball attack?

To legally spike the ball when positioned at the net, you must be a front row player. So usually it’s just the front row players on the team that spike the ball.
Back row players can legally spike the ball from behind the 10 foot (3 meter) line. This is a much more difficult type of volleyball attack and is used only by more experienced volleyball players.
The basic classical spike is made by jumping off of both feet.
A spiker usually takes a series of steps to attack the ball.
These steps are called a volleyball approach.
The goal of the volleyball approach is to get in the best position possible to attack the ball.
When teaching a player to approach and hit a volleyball, you might start with learning the last 2 steps. Once the last 2 steps are learned, you can move on to perfecting a 3 step or a 4 step volleyball approach.
Last 2 Steps

When first learning to spike, concentrate on just these last two steps and work on timing the hit.

For a right handed hitter, the last 2 steps are right foot then left foot.

For a left handed hitter, the last 2 steps are left foot then right foot.

3 Step Approach

    For a right handed hitter, the 3 step approach is left foot, right foot, then left foot.

    For a left handed hitter, the 3 step approach is right foot, left foot, then right foot.

4 Step Approach

    For a right handed hitter, the 4 step approach is right foot, left foot, right foot, then left foot.

    For a left handed hitter, the 4 step approach is left foot, right foot, left foot, then right foot.


The six basic volleyball skills are passing, setting, spiking, blocking, digging, andserving

Passing is often thought of as the most important skill in volleyball. If you can't pass the serve, then you won't ever put your team in a position to score a point.

The importance of serving is often undervalued. Many coaches don't teach players to serve aggressive and use this opportunity to give the team an advantage for scoring points.

Blocking is perhaps the least taught skill in volleyball. Players can get away with poor blocking skills because not blocking isn't going to hurt the team as much as being poor at executing other skills in volleyball. 

Digging is another skill that isn't focused on quite as much as most skills in volleyball. 

The setter position is considered to be the most important position in volleyball. The setter basically runs the team offense.


10 Tips to Improve Setter Leadership


Use the following tips to help improve your setting.

1. Make your teammates feel comfortable. Learn how to communicate positively with your teammates. You should never be the most silent player in the gym.

2. Be the hardest worker. If the coach asks for a volunteer, do it. Anytime there's an opportunity to get more repetitions in, take advantage of the situation. The setter needs to have good all around playing skills, so help out with drills anytime your team needs help. As a setter, the better developed your skills are, the more your team will look up to you.

3. Know how your hitters like to be set. It's very important to develop a good relationship with your hitters. You need to know what motivates them. As a setter, you need to be mentally strong and able to accept criticism from them. Let them know you want to receive feedback from them.

4. Keep your hands high. You need your hands to always be high every time you set because you want the volleyball block on the other side of the net to have a hard time reading you. If your technique is consistent, you'll be much harder to anticipate.

5. Make your teammates better. If you have a strong relationship with your teammates, then it will be easier to make them better. The setter is, "the coach on the floor". Learn how to communicate with your teammates and get the most out of their ability.
Setting volleyball teamwork
6. Keep your setting technique consistent. A consistent body position and hand position will help keep you deceptive. For instance, if you arch your back too much, blockers can tell you will set back. If you take the ball too far out in front, they'll know you're pushing the ball outside.

7. Be comfortable communicating with your coach. Always respect your volleyball coach and ask them questions. Voice your opinions and share your ideas. Just be sure to talk. The more you talk, the more comfortable you'll be.

8. Constantly work on technique. You can never work on your hands too much. Practice setting a volleyball a lot especially if you're a beginner. You want to get to the point where you don't have to think about technique anymore. You want to just be able to playing and not think about technique.

9. Work on your quickness. You can practice your footwork anytime and anywhere. Setting is all about rhythm. Quick feet drills will help improve your coordination and rhythm.

10. Play as often as you can. Even if you're not setting, just playing volleyball will improve your knowledge of the game. The better your all around skills, the more confidence you'll have and the more respect you'll have from teammates.

1. Elbow to wrist.
The elbow to wrist technique is a skill for spiking a volleyball. This spiking technique is a skill that needs to be developed early.

2. Platform elbow to wrist.
The next step of spiking is learning to spike down over a net. It's important to first learn to spike a volleyball from an elevated platform because it's much easier to just focus on contacting the ball rather than trying to learn the entire volleyball approach and volleyball footwork all at once.

3. Teaching topspin.
You really need to get players contacting the ball right really soon. Contacting the ball the right way is really important. Creating topspin is important for greater ball control and accuracy.

4. Blocking basics.
volleyball practice plan blocking You want your players to learn techniques for blocking early on in their career to avoid creating bad blocking habits. Especially when players are young, blocking isn't taken very seriously because of the many unsuccessful block attempts.

For example, most 12 and 13 year old kids can't get their hands but a few inches above the net when they block. So from early on, poor blocking habits such as not penetrating the net, not blocking the crossing space, and reaching high instead of taking away area are created. You can avoid these poor habits by first learning good hand positioning and having players block balls successfully on a lower net or while standing on a platform at the net.

Volleyball practice plan blockingBlocking
5. Three person defense.
The three person defensive drill is great for players learning anticipation and not give up on one another. Often when first learning to play volleyball, the tendency is to watch your teammates make the play and not be ready to help out after the ball is passed. Three person defense is a drill where the object is to keep the ball in play no matter what, never giving up on your teammates.

6. Serving basics.
volleyball practice plan serving Learning how to serve is one skill in volleyball every player needs to learn. Especially if your contact and arm swing isn't well developed, use serving as an opportunity for more repetitions working on contacting the ball correctly. Serving is also very important for winning. Every team can learn to serve tough serves. It's just a matter of being disciplined and putting in the time to develop serving skills.
Volleyball practice plan serving
Serving
7. Error correction slice game.
A slice game is basically played by slicing up the court. For example, one team defends zones 2 and 1 while the other team defends zones 4 and 5. This is basically a cross court scrimmage. This drill is great because it's much less chaotic than a regular scrimmage because the court area is smaller.

The area of court to hit into is much smaller which makes it much more difficult to put the ball away for a kill. There is also much better ball control, so the drill has many more good repetitions and longer volleys.

8. Team warm up exercises.
Every volleyball practice plan should have warm up exercises. Every practice have your team perform warm up routine. Just by spending 5 or 10 minutes a practice warming up in the beginning can make a huge difference in long term benefits of injury prevention and improved athletic performance. Just 5 or 10 minutes a day of low impact plyometrics and speed drills will go a long way.
Volleyball practice plan passing drills
Passing
9. Meat ball drill.
volleyball practice plan passing The meatball drill is great for both serving and passing. This serve receive drill is great for teaching servers how to be deceptive with their serves. Also, this drill is great for passers to experiment with where to start on the court for serve receive. Also, the passers develops skills for anticipating the server and become more comfortable moving to get in position to pass.

Volleyball Practice Plan

How you design a volleyball practice plan really depends on the current skill level of your players. For example, you may notice that you have many players that contact the ball really poorly. Lets say for example, every time a player spikes the ball, the ball floats out of bounds. In this case, a much greater amount of practice time can be spent on practicing how to contact the ball (elbow to wrist and topspin drills).

In this situation, your volleyball practice plan could look something like this...

Dynamic Warm Up (10 minutes)

Partner Passing Drills (10 minutes)

Elbow to Wrist/Topspin Drills (30 minutes)

Blocking Drills (15 minutes)

Hitting Drills (10 minutes)

Serve Receive/Free Ball Drills (15 minutes)


Your volleyball practice plan really depends on many factors...
  1. What level you coach.
    Higher level teams are more skilled and therefore you would need to spend less practice time on developing skills.

  2. How skilled your players are.
    The more skilled the players, the more time can be spent on other things such as strategies for playing defense and running the offense.

  3. How much your players are willing to learn.
    Some kids want to play volleyball just to have fun and use it as a way to socialize. If your players don't want to learn then you'll have to design practices that are more focused on fun drills and less on developing skills and playing strategies.

  4. How much your players buy in to what you're teaching. 
    If your players don't buy into what you're teaching, then it's going to be hard to run great practices. Many coaches that don't have players buy in end up running practices that are more like scrimmages with less skills training.

  5. How well skilled you are as a coach. 
    If you don't know that much about volleyball then your practices are going to be much different than a coach that has more experienced.